
Vegan Recipe App
T-Shirts for Activists
Newsletter
Ad-Free Browsing
Partner with us
Cookbooks
Petitions
Product Features
Adopt-a-Pet
Get thousands of vegan, allergy-friendly recipes in the palm of your hands today!
X
Get your favorite articles delivered right to your inbox!
X
5.6K Views
7 years ago
How to Make DIY Water-Efficient, Wicking Beds With Upcycled Materials

Image Credit: jgolby/Shutterstock

Audio By Carbonatix
As our freshwater sources dwindle, it will become more and more important using minimal amounts of water for gardening, and there are many techniques commonly used for doing this. Deeply mulched gardens use only small percentage of the water bare soil gardens use because they prevent water runoff and evaporation. For similar reasons, irrigation lines running along the ground via soaker hoses are much less wasteful than the airborne irrigation we get with sprinklers.
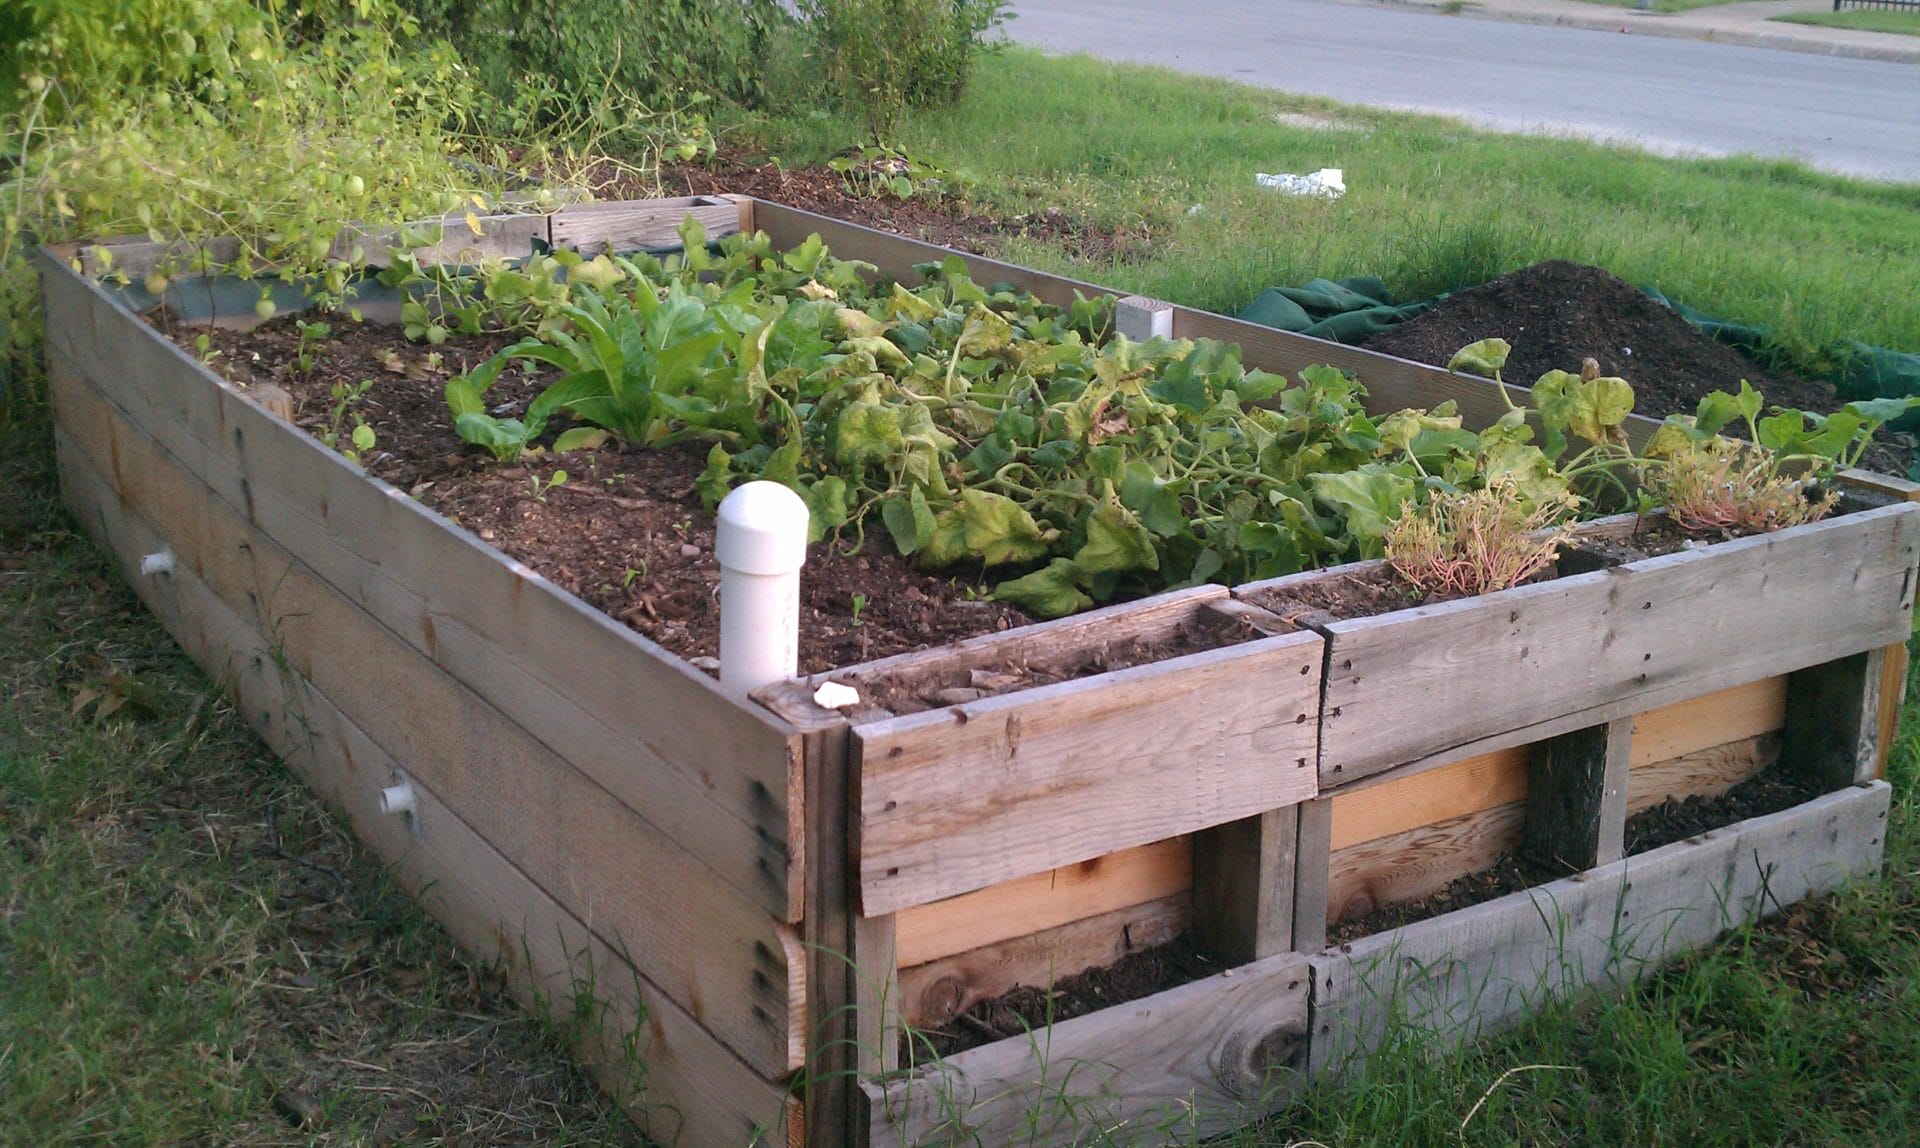
Perhaps the most efficient way to grow our vegetables, both in terms of resource Conservation and human effort, is cultivating them in wicking beds. Wicking beds are large, virtually self-watering gardening beds that have no evaporation concerns and no water runoff, as well as many other benefits. Even better, they can be built from repurposed materials, taking stuff out of the overcrowded waste stream. For those looking to grow their own food, particularly in urban and suburban spaces, these types of gardens are a great option.
Source: Angel Schatz/Flickr
What Is a Wicking Bed?
A wicking bed is a raised garden built over a reservoir of water so that the soil wicks the water up from below. As long as the reservoir has water in it, the soil will not dry out. It also won’t overwater the plants because, once moist, the soil will not continue to wick water up. Rather, it amazingly regulates and replenishes based on what the plants’ roots are sucking out, so the right amount is always available, particularly for thirsty plants. It’s a largely self-watering garden bed that only needs occasional refilling — about once a week — rather than consistently administered irrigation. Plus, it eliminates any worry of water runoff or evaporation.
Source: Anastasia Victor/Flickr
What Is an IBC Tote?
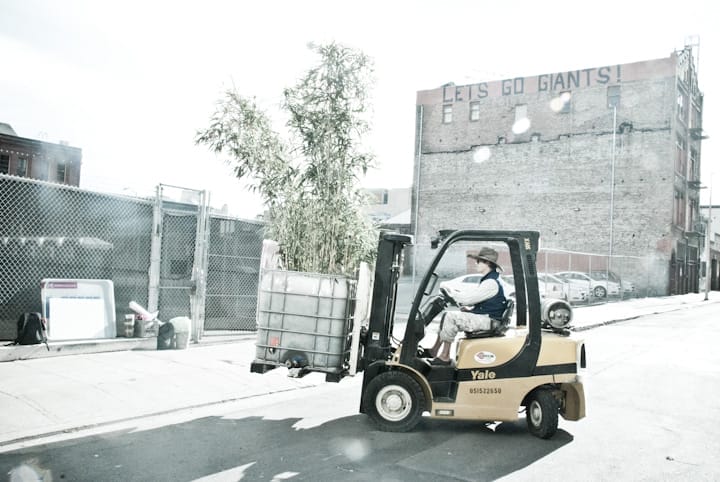
One of the most popular ways to build wicking beds is repurposing IBC (international bulk container) totes. These are basically like pallet tanks that are used to transport large quantities of liquid, often food products like syrups and hot sauces as well as chemicals. They are built of plastic with metal caging to add strength, and they are often one-time use containers. IBCs that were used for food are a super score: Not only have they not been tarnished with chemicals, but they are also food-grade plastic, which is safer to use for growing food. These can be found on Craigslist, eBay and similar outfits.
Other Materials Needed
IBC tote wicking beds — each tote makes two — aren’t all that complicated to build, and much of the rest of the materials can likely be sourced secondhand in reclamation shops, such as Habitat for Humanity Restores. Besides the tote itself, making each bed will require:
- For the reservoir overflow: an irrigation hose joiner fitting, a bit of rigid landscaping hose (maybe one foot) and an elbow to go on it
- For the reservoir: a small length of slotted agricultural pipe (maybe 3-4 feet), a two-foot piece of rigid 2” piping that fits snugly into the agricultural pipe, a cap for the rigid pipe, a square yard of permeable fabric (either geotextile or something like a cotton sheet), and porous rocks, such as pumice or scoria
- For the garden bed: soil, mulch material and plants
In addition to these necessities, there will be a few tools necessary, such as an angle grinder or reciprocating saw and a drill. Having a couple of scrap screws and the like around would be helpful, too.
How to Make an IBC Wicking Bed
The first step to making the IBC wicking bed is the most daunting, and that’s cutting the IBC tote in half horizontally, creating a top half and a bottom half. Each of these halves can be its own wicking bed, accounting for about 20 square feet of growing space. From here, most people like to unhook the metal cages and turn them upside down so that the sharp, cut edges aren’t sticking up where they could catch an arm or hand. These can be filed down to help in this effort.
The next step is to create the water reservoir overflow. That’s as simple as cutting a small hole near the base of the wicking bed. An irrigation joiner (to fit your irrigation hose) should be shoved through the hole and the edges sealed with silicone. The elbow should be placed on the joiner (not glued) with the length of irrigation hose sticking up vertically out of the other side of the elbow. This will control the water level within the reservoir, and it can be adjusted by rotating the elbow.
For the reservoir itself, the first step is covering the bottom of the IBC with a thin layer porous stone. That is followed by laying the slotted agricultural pipe atop the rocks and putting the rigid pipe into the agricultural pipe. Then, the rigid pipe is held vertically in a corner of the tote such that it sticks up past the top. While holding it, add more porous rock until it covers the agricultural pipe and is almost a foot deep. Once that’s finished, the last step is to cover the rock with permeable cloth.
Now, it’s time put in the garden. The soil should be at least 50% organic material to help with the wicking action of the soil, and it should be no more than a foot deep. Once the soil is in, it’s time to plant some seeds or seedlings. Lettuces and similarly thirsty plants love wicking beds. And, like any good garden, a thick layer of mulch material should cover any exposed soil.
How to Use the Wicking Bed
Once the IBC wicking bed is built, it’s easy to use. Fill up the reservoir, using the overflow to signal when there is enough water. For its first use, it’s good to water the plants in from above as well. Then, it’s a matter of filling the reservoir about once a week, and that should handle the watering for these gardens. This design is all about conserving water and minimizing gardening work.
Easy Ways to Help the Planet:
- Eat Less Meat: Download Food Monster, the largest plant-based Recipe app on the App Store to help reduce your environmental footprint, save animals and get healthy. You can also buy a hard or soft copy of our favorite vegan cookbooks.
- Reduce Your Fast Fashion Footprint: Take initiative by standing up against fast fashion Pollution and supporting sustainable and circular brands like Tiny Rescue that are raising awareness around important issues through recycled zero-waste clothing designed to be returned and remade over and over again.
- Support Independent Media: Being publicly-funded gives us a greater chance to continue providing you with high-quality content. Please consider supporting us by donating!
- Sign a Petition: Your voice matters! Help turn petitions into victories by signing the latest list of must-sign petitions to help people, animals, and the planet.
- Stay Informed: Keep up with the latest news and important stories involving animals, the environment, sustainable living, food, health, and human interest topics by subscribing to our newsletter!
- Do What You Can: Reduce waste, plant trees, eat local, travel responsibly, reuse stuff, say no to single-use plastics, recycle, vote smart, switch to cold water laundry, divest from fossil fuels, save water, shop wisely, Donate if you can, grow your own food, volunteer, conserve energy, compost, and don’t forget about the microplastics and microbeads lurking in common household and personal care products!





Comments: